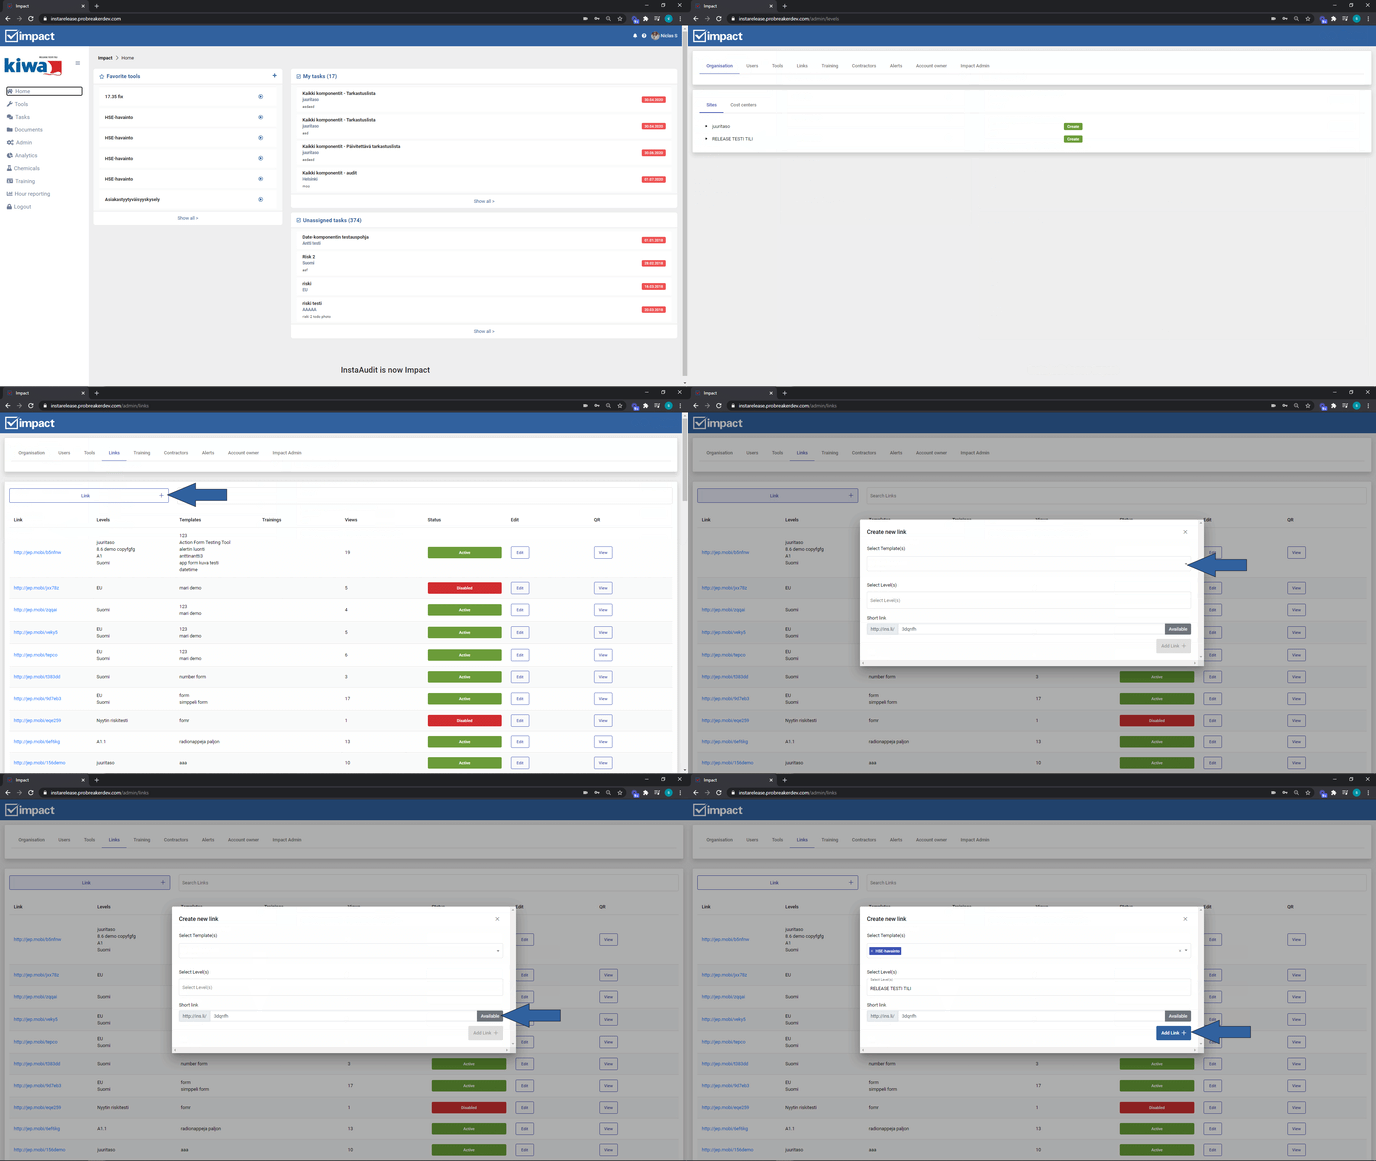
Creating & Editing a Link
The instructions below walk you through how to create & edit links.
The links are created and edited via the admin page.
- Start creating a link from the admin page.
- Click on links.
- Click Link + at the top left.
- Select the desired template (Tool). Note!! only form tools can be used as a template via a link.
- Select the object (the level) to which the tool filled via the link is directed. The level Leppävaara used in the example. Note!!! When editing the organisation tree, such as setting levels to unselectable or adding new levels, the changes must also be made separately behind the link. Levels must be removed from the back of the link before they are set to unselectable in the tool fill.
- You can set the rest of the link you want by typing it in the short link line, or let the system set it. If you decided to set the shortlink yourself, press check availability.
- When all the fields are filled in, finally press add link +.
You can edit an existing link by clicking the Edit button next to the link. Here you can change the tool and level(s) in use.
Under Qr you can see the link in Qr code format, and you can also print the Qr code.
(clicking the image opens a larger Gif)
