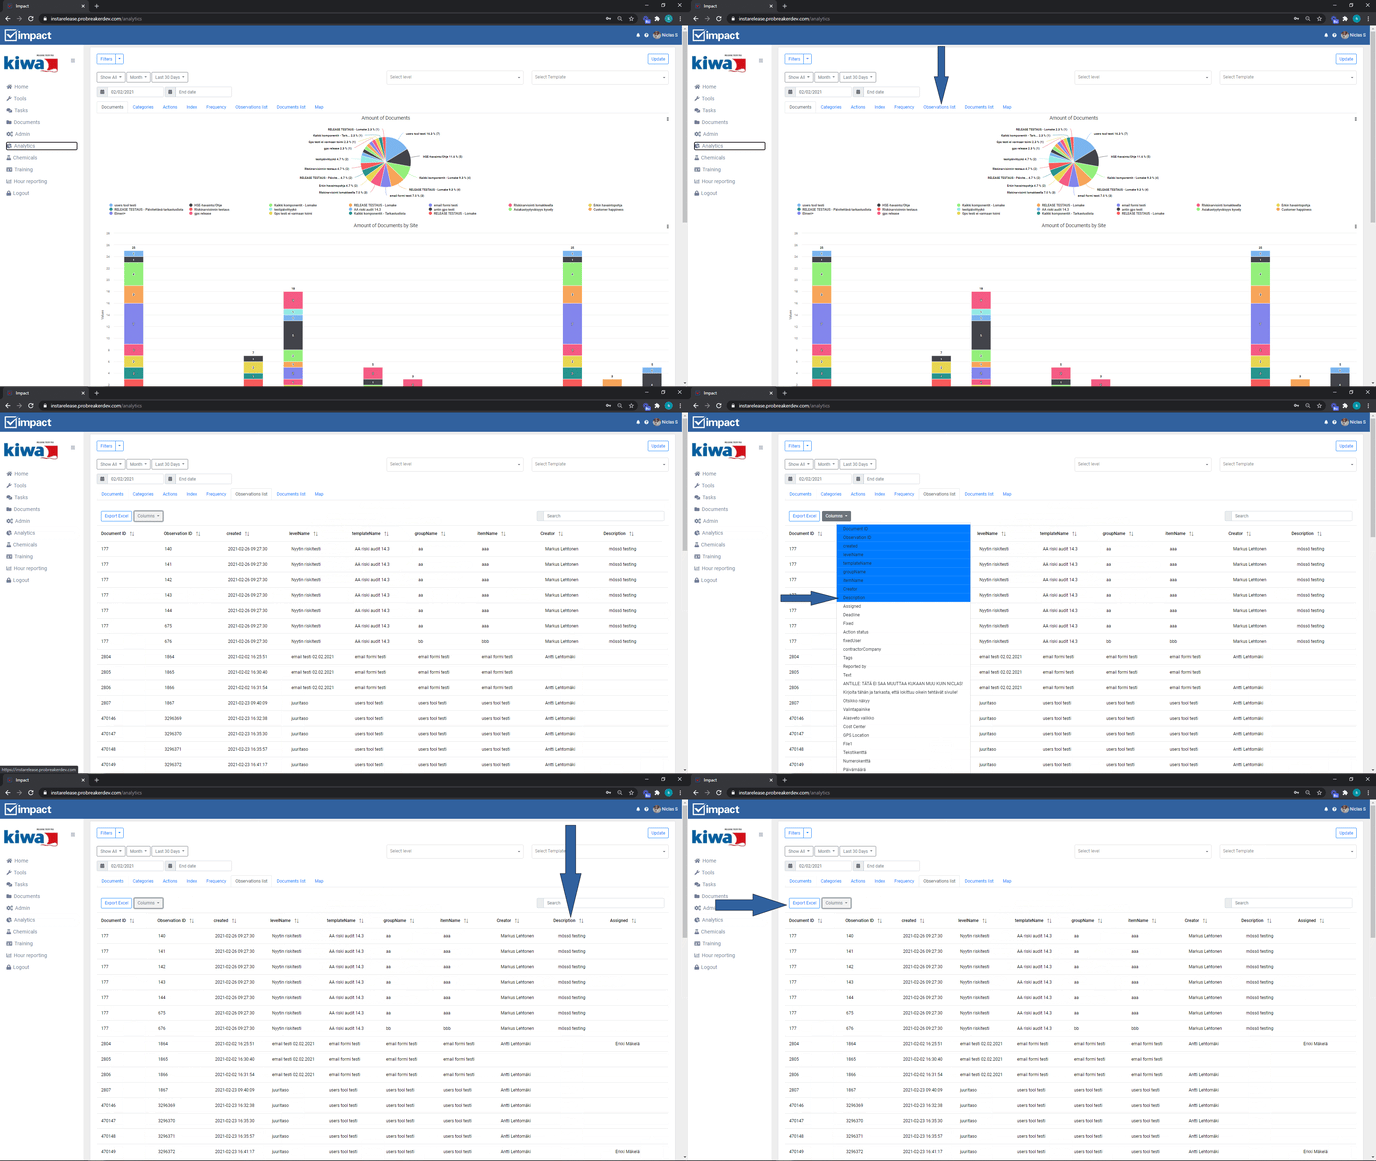
Observation list and Document list tabs
This guide walks you through the contents of the Observation list and Document list tabs and how to use them to process your data.
The Observation list and Document list tabs are very similar, so they are covered in this tutorial. From each tab, the desired lists can be printed out in Excel format. Their content is different. The list of findings shows all the filtered findings with your selected columns, while the list of documents shows all the selected documents with information.
Below we will go through the observation list and document list in more details and how to print the lists from Impact to Excel.
Observation list
The Observation list tab lists all observations with a selected filter and the selected data. From the list of observations, it is possible to search for the desired observations using the search field with all the data in the columns. The search is open.
The columns in the tab list can be modified with your own selections via the Columns menu:
- Click on the Columns button, which opens a drop-down menu.
- Select which fields you want to appear by clicking on them in the drop-down list.
- Fields are selected as columns when they are shaded.
- Finally, close the drop-down menu by clicking on the Columns button again.
Clicking on a row of an observation will take you to the edit view for that observation's task, where you can view more detail on the observation's task and process it. Closing the task after reviewing/processing will return the view back to the observation list.
For more information on task processing, please refer to the separate guide on task processing.
You can also export the list directly to Excel by clicking Create Excel. If you need more detailed information on how to print Excel, you can find it at the end of this guide.
Document list
In the Document list tab, you can see a list of all filtered documents and their information. The columns in the document list cannot be edited in the same way as in the observation list. Only the default columns are available on this tab.
It is possible to search for documents in the search field using the information in all columns. The search is open.

Clicking on a document row will take you to the document view for that document to view the full information in the document. Closing a document after viewing it will return the view back to the document list.
You can export the list directly to Excel by clicking on Create Excel. If you need more detailed information on how to print Excel, you will find it at the end of this guide.
Printing the list
From either tab, you can print the displayed list to Excel. To print the list, follow the instructions below:
- Make the filters you want, in the observation list also select the columns you want to display.
- Click on Create Excel.
- Open the downloaded files in the Excel that you just downloaded.
Please note the following when printing Excel.
- The Image column in the Observation list will print the image data to Excel, but not the images themselves.
- The maximum number of rows that can be transferred to Excel is 2 000 rows. Larger lists than this should be printed in sections out of Impact and then manually pasted together.
